


wordsmith
-
Posts
2,729 -
Joined
-
Last visited
-
Days Won
56
Content Type
Profiles
Forums
Events
Everything posted by wordsmith
-
Thanks - but the wheels won't be coming off - at least, I hope not! But I didn't realise that the technique is as you described - I assumed they had some sort of adhesive backing which might 'grab' the rim at first approach. Here - one lives and learns every day!
-
Looks pretty good to me, estelle - and who is usually a bigger critic of our work than ourselves, so if you're satisfied... I too am interested to see the red front fender. Even before I got this bike I've been contemplating painting the pannier lids (as I did on my last Tracer, with good results), but the colour match would have to be excellent, so strong and striking is the Lava Red paintwork. The front fender might be a good place for me to trial both technique and paint colour...
-

What did you do to your FJ-tracer-gt today?
wordsmith replied to yamaham's topic in FJ-09 Tracer 900 General Discussions
Thanks, betoney. I'd like to think it cost me nothing, but a forensically-minded bean-counter would say that I had to buy the mesh anyway (true enough), even if maybe years ago, and then there's the 'opportunity cost' and so on. I reckon it may have cost me one-third of the price of the full sheet of mesh, say $8. Plus a little time - and a degree of satisfaction at another farkle ticked-off! -
What did you do to your FJ-tracer-gt today?
wordsmith replied to yamaham's topic in FJ-09 Tracer 900 General Discussions
I had some aluminium 'decorative mesh' left over from a previous project and decided to use it to make a radiator guard. This is yet another of the many farkles I've done in the past, so not much head-scratching was needed! I've seen the mesh in anodized silver, gold, and strawberry-red colours, but black is more appropriate in this location I think, and anyway is what I had. The mesh, sold in auto stores here at AUD$25 to $30 for the piece 1200mm x 280mm is easily cut, using some blue masking-tape as a guide. I used a very thin blade on my angle-grinder, but decent tin-snips would cut it easily. The front face of the rad measures 345mm across x 230mm. I made the piece a little wider than the measured distance across the rad so as to be able to snap it into the shallow groove on each side, which helps to secure it. It's also secured by two (one at each end) heat-resistant heavy-duty zip-ties running vertically around the new guard and the rad itself. By flexing the guard outwards a little it also took on a slight bow shape, stiffening it somewhat and also moving the face of the guard away from the rad face, thus giving a bit more of an impact-cushioning effect should an Exocet missile strike. It would not help in that event, of course (!), and might not stop some damage in the event of a decent-sized rock hurling itself at the bike at 100kph, but it will definitely stop or minimise damage from small stones, gravel, and sand, that can quickly give a pitted and sand-blasted look to the very vulnerable radiator. All that remains is to touch-up with some black paint the upper cut surface, and we're good to go! Next job: to make an extension to the ineffective rear 'hugger'.

-
I'm not a fan of bling for bling's sake, but having seen many pix here of bikes with wheel rim stickers/ decals thought might consider it. I do lurv the Lava Red of my bike and a little more wouldn't hurt. But - seeing that they come as a 'kit' of (seemingly) several pieces that are applied to the rim, may I ask how tricky it is - or is not - to get the perfect circle? I wouldn't want anything less than perfect! Thanks.. The pic below shows what I mean, though this isn't necessarily the brand I'd buy, just to illustrate the question.

-
That part number will be useful when I ask the dealer to order, otherwise GK what I'll end up with! Many thanks...
-
I now don't intend to, but it seemed a good idea at the time! I plan to have the dealer install the revised clutch lever assy with new cable at the upcoming first 1000km service. I'll argue - weakly - it should be a warranty at-no cost job, but am not holding my breath!
-
Great pix, jd. I too noticed all that greenery today!
-
What did you do to your FJ-tracer-gt today?
wordsmith replied to yamaham's topic in FJ-09 Tracer 900 General Discussions
Thanks, koth - I have been, and pretty much all done now apart from a little 'bling' (dressing-up the pannier lids, and some red-coloured tape along the crease-line under the tank), but still thinking about a tail-tidy. Then that's it! Then - when the weather is kinder - a little riding! -
What did you do to your FJ-tracer-gt today?
wordsmith replied to yamaham's topic in FJ-09 Tracer 900 General Discussions
Thanks, betoney! It's always like this with every new bike I buy, and in this case it took a little while for the bike to be freighted the 1847km to me, so I spent some useful waiting time ordering on-line what I needed, aided of course by the fact that I'd 'been there, done that' on Tracers previously. I knew that nothing had changed so felt confident in going ahead. I too love to tinker and fiddle and to create solutions using non-standard bits 'n' pieces, often sourced from the strangest places! But now I'm pretty much done, and will be getting out and about when this current very hot, humid, and unpleasant spell of weather ends. Even in a full mesh jacket, more holey than Mother Teresa, I find it pretty tiring on the bike in such conditions. I never could ride gloveless, in shorts and t-shirt as some do, but I kinda envy them! Best... -
Thanks, koth - no, and it doesn't matter; I know where I live, others don't need to!
-
Wodduz this mean, Cruizin?
-
What did you do to your FJ-tracer-gt today?
wordsmith replied to yamaham's topic in FJ-09 Tracer 900 General Discussions
Fitted the Grip Puppies, an easy chore that I’d completed several times before on various bikes. For me their main purpose is to increase the grip diameter, as I find the pencil-thin grips on most bikes uncomfortable after a while. They also reduce vibration felt through the ‘bars, but in all honesty I cannot say that I detect any at all on this Tracer. GP’s fitting instructions amuse me – “just apply a little soapy water and slide them over your existing grips”. You’ll be lucky! Not to say that it’s difficult, but practice makes nearly perfect. On my other bikes, mainly BMW’s, the GPs needed to be cut down by about an inch, but these fit perfectly. I hasten to add my bike does NOT have heated grips. After unscrewing the end of the hand-guard mounting brackets the ends of the grips are exposed. I stood the GPs in some hot water for a minute or two while removing the ‘bar fastenings, then applied a lot of liquid soap to the bike’s grips. I eased – as in EASY does it – the start of the GP onto the end of the grip and wiggled it on for an inch or two. Screwdrivers, steak knives, Japanese samurai swords were not used to start the process. Then, gripping the GP firmly with a towel it was simply rotated forwards and along the grip while applying firm inward pressure. Following this procedure the GP makes steady progress along the length of the grip until it comes up hard against the inboard end. Repeat the other side. Both GPs were then liberally rinsed with warm water to wash away as much as possible of the soap residue, then squeezed along their length with a towel to dry things off. Purely as a matter of idle interest I timed the process from woe to go (excluding the rinsing and drying) – seven unhurried minutes. I have no doubt that the first time I encounter heavy rain my bike will have a stream of colourful bubbles coming from the handlebars as the soap residue washes out, but it cannot do any harm if not. Major farkling is now just about completed, apart from fitting my new Bagster seat, e.t.a. still unknown, but I guess that much of Europe is on holidays, or in strife. A couple of little cosmetic touches remain to be added – ‘bling’, if you will – but that’s it!

-
How do we 'enter'? I don't see a link or whatever...
-
What did you do to your FJ-tracer-gt today?
wordsmith replied to yamaham's topic in FJ-09 Tracer 900 General Discussions
The front conspicuity LEDS/ DRLs arrived yesterday, exactly three weeks after ordering, and I set-to immediately, helped by previous installations of the same lights on other bikes and some helpful words from others on this Forum. This pair cost me AUD$29 delivered - exceptional value-for-money in my book. Thinking about where and how to mount them I went back to the past and put an aluminium ‘light-bar’ across the front of the bike, immediately under the headlights. On my last Tracer the light-bar comprised a length of very thin-walled steel tube, extremely stiff, which I dressed-up with some carbon-look vinyl, but these new LEDS are different to those before and the through-bolt mount would not work satisfactorily on a tube. So this bar was made up from a length of what the hardware store called ‘gutter strip’ – in profile it’s like a capital letter J with an extended upright. The ‘gutter’ is a half-round extrusion along one side, which stiffens the strip appreciably, but I’m not at all sure of its real purpose! I again applied some carbon-look PVC sheet vinyl as this gives a nice match to the adjoining carbon-look elements that are wrapped around the headlights. Wiring was simple enough, again thanks to previous installs and help here, for I know as much about electrons as the average earthworm! I ran the wires from the LEDs under the mounting plates behind the windscreen, and simply connected them via Posi-Taps (black to black/ red to brown) to the leads for the spare grey-ish coloured terminals there (see first pic). Both terminals’ leads were tapped into as I don’t plan to install any other electrical items, and I didn’t bother with a switch – the LEDs will be on when the ignition is on. All went well – albeit pretty slowly – except that I had a small heart-attack when switching-on the first time and only one LED lit-up, but a quick checking and tightening of the Posi-Tap connections soon fixed that – and lo! – there was light! “Brighter than a thousand suns” about sums it up! All that remains now is to align the LEDs when I'm next out, and paint the mounting-bar's bright metal threads and securing nuts under the headlights matte black to make them a bit less prominent. When out and about recently, along with lots of other motorbikes, I took particular note of front-facing lights on other machines, and many were so dim that a self-respecting glow-worm would have been ashamed. But a lot of bikes nowadays are carrying additional DRLs of one kind or another. So now with added lights front and rear, and a decent audible warning device I should be a little safer on the roads here and just maybe will avoid the dreaded SMIDSY encounters!


-
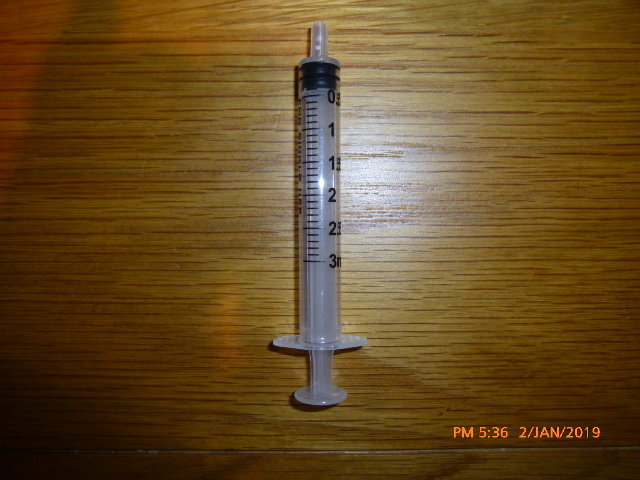
Took my doggie to the vet a few days ago for a routine injection, and thought to scrounge the body - not the needle - of the syringe from the vet. I figure it will be handy to squirt some oil into the clutch cable before I get the replacement part fitted later this month.
-
What did you do to your FJ-tracer-gt today?
wordsmith replied to yamaham's topic in FJ-09 Tracer 900 General Discussions
I finished a slightly more interesting and meaningful farkle today. Traffic is mad and weather hot and humid, and raining on and off, so better off in the garage than on the road today! Installation of the rear brake-light LED flashing/ pulsing function is now completed, after some earlier pre-fabbing of the wiring. The LEDs were mounted onto a small aluminium bracket just below the rear light cluster, with the rear face of the LEDs vertically in-line with the LEDs in the main brake light. This keeps the mass of lights in one place for optimum visibility. The LEDs were then wired-in to the other components which were ready and installed in the bike. The whole kit takes up negligible room under the pillion seat – in the pic the relay is arrowed orange and the Modulator in green. Wiring is untidy – I’ll fix that later now that I know it all works. The various parts involved are: · the two red LED strips · a 5amp in-line fused wire from the battery · the relay, which is nothing more than an electronic switch · the GS 100A Modulator to create the flashing/ pulsing function · 4 x small spade terminals to suit the relay · some wire · a little heat-shrink tube. When either brake is applied current from the rear brake-light lead (yellow) powers the LEDS in a sequence of 5 slow flashes, then 5 more rapid flashes, then the LEDs stay on in steady state along with the pretty weak OE brake-light. The LEDs are actually quite a bit brighter than the pic suggests. The intention is to highlight to following vehicles that the bike is braking – on previous bikes it was so highly visible that I have had other riders stop me and ask for details! The SKENE proprietary P3 lights are an alternative, and having had them on earlier BMWs I can say they are excellent, but pretty expensive. My set-up here cost me about AUD$35, plus some enjoyable time ‘tinkering’!


-
What did you do to your FJ-tracer-gt today?
wordsmith replied to yamaham's topic in FJ-09 Tracer 900 General Discussions
Yes - of course I was referring only to fitting the GPs over the standard OE grips - add another layer of grip as with the heated versions and things change! -
What did you do to your FJ-tracer-gt today?
wordsmith replied to yamaham's topic in FJ-09 Tracer 900 General Discussions
Another minor farkle added today was the pair of rear-view mirror risers/ extenders - like on the old Berlei-bra ads, they lift and separate. They lift (raise) the mirrors by about 35mm, or ~ 1.5", and move them outwards by about 50mm, or ~ 2". Small gains, but worthwhile IMHO. Nicely-made and finished, and again something I've fitted to other bikes so as to improve ease and effectiveness of rearwards vision (in my case, aided also by the pair of 2" 'dead-spot' mirrors). Once again these parts come with no instructions, which would have been handy as we are dealing here with left and right threads, the right-hand (brake) side mirror stem being left-hand thread. The left-hand (clutch) side extender has to be rotated just a little so that it clears the toggle 'select switch' there. And - there's nothing worse than a mirror that's flapping in the breeze as you proceed at warp speed, so I always carry a spanner so that I can tighten the securing-nuts if needed.

-
What did you do to your FJ-tracer-gt today?
wordsmith replied to yamaham's topic in FJ-09 Tracer 900 General Discussions
I ordered a new rear carry-rack on EBay on Dec 26th and it arrived today, Jan 2nd, well in advance of the promised delivery window of Jan 14th to Feb 19th. Good work! I’ve fitted at least two of these useful additions before. The kit is 100% complete, everything well-made, and extremely sturdy – I reckon a fully-grown man could safely stand on it, once fitted. Easily installed too, even if the OE bolts securing the pannier-rails to the bike were installed by Yamaha using Kryponite thread-lock, requiring a rubber mallet to shift them! And a small but valid gripe might be that no instructions are included. A simple line drawing would suffice, no words needed IMHO. The EBay site shows various vendors of these racks, varying only in the pattern of the cut-outs and holes in the plate, and some are priced at more than double what I paid - AUD$135 delivered. I have two different-sized Pelican-style cases that serve as useful top-boxes, the larger one seen here taking my two-piece wet-weather gear. On other bikes I have also mounted a full-size conventional top-box of about 28L capacity onto this rack. The top-plate might even provide a good location for mounting the pumpkin rear indicators if I proceed with installing a tail-tidy. Excellent value and well recommended.


-
What did you do to your FJ-tracer-gt today?
wordsmith replied to yamaham's topic in FJ-09 Tracer 900 General Discussions
Bad move using anything sharp to fit Grip Puppies! At the most, if necessary, use the handle of a smooth teaspoon to wiggle the GP on. And plenty of soapy water - in fact more (liquid) soap than water - to ease things along. Still waiting for my GPs from the UK, ordered on Dec 12th - must have been held-up behind some slow-moving reindeer! -
What did you do to your FJ-tracer-gt today?
wordsmith replied to yamaham's topic in FJ-09 Tracer 900 General Discussions
Took my new-ish Tracer for it first half-decent ride of 170km out towards the lakes region to the NW of Brisbane. Left home at around 6am, temp was 23 deg C then, rose to almost 30 by the time I got back home some three hours later. Too hot - I felt a bit unwell arriving back home, which I put down to possible dehydration. Memory can be a fickle thing, but I have a strong impression that this specific bike is by far the smoothest of the Tracers I have owned. Maybe being almost four years old has matured it, like fine wine! The rubber-topped foot-pegs don't have much of a job to do as far as smoothing out vibes is concerned, and when they arrive the Grip Puppies will have even less vibe-quelling to do. Decidedly un-smooth is the stock suspension - it's as harsh and reactive as I can recall. But I have kept the settings I found adequate before, and will dial them in after a few hundred more kilometres, which will allow the surfaces of the suspension's moving parts to bed-in. I still await a few important farkling parts, notably the Bagster seat (the maturing process obviously hasn't worked on the crap OE seat!); Grip Puppies to make the pencil-thin grips more comfortable for me; mirror risers/ extenders to enhance the view behind; a sturdy rear carry-rack on which I'll mount a small Pelican-type top-box to carry wet-weather gear: and the pair of DRL LEDs. I have already prefabbed the wiring for these, ready for a quick and easy installation. Looking forward to more days out, but only when this current hot heat and high humidity permits pleasurable riding. -
What did you do to your FJ-tracer-gt today?
wordsmith replied to yamaham's topic in FJ-09 Tracer 900 General Discussions
Many thanks to all you guys who suggested solutions to my rear indicator dilemma, such as the Motodynamics product and the Blaster-X item, similar in approach in integrating both tail and brake-lights and indicators in the one neat housing. Unfortunately, I now understand that such devices are illegal here in Oz. Regs state that there must be x-inches of horizontal clearance between indicators at front and rear of a vehicle, and the integrated units suggested are not legal. Bugger! - I was warming to one or the other! I think I'll stick for the time being at least with what I've got, the unlovely and unloved 'crane', and when the final parts arrive for my flashing/ pulsing rear brake-light set-up I'll take it from there. Maybe my two remaining brain-cells will come up with something else in the meantime, and I'll be in a better position to decide which direction I want to take. I appreciate all the suggestions... -
What did you do to your FJ-tracer-gt today?
wordsmith replied to yamaham's topic in FJ-09 Tracer 900 General Discussions
That's what sons are for! -
2017 FJ-09 How To Reset Check Engine Light
wordsmith replied to dbeau's topic in FJ-09 Tech Tips/How to's
I have often read of these codes and what they can show, but have no idea how to access them, if possible. Does one need the full-on service manual? Would my 2015 have whatever software is involved already installed? Puzzled...!


